How to Install Artificial Grass | CCGrass 2024 Ultimate Guide
- 02/28/2024
Installing artificial grass can be a great way to transform your outdoor space, whether it’s a backyard, front yard, or even a commercial area. Not only does it provide a low-maintenance and attractive alternative to natural grass, but it also offers a range of other benefits, such as water conservation and durability.
However, when family homeowners consider the transition to artificial grass, queries frequently surface concerning its installation simplicity and the practicality of self-installation.
Further concerns generally relate to required maintenance procedures. To address these questions, we have collated a comprehensive guide outlining the process of artificial turf installation from beginning to maintain.
Whether you are a DIY enthusiast or a professional landscaper, these tips and techniques will help you master the art of artificial turf installation.
WATCH: How to install astro turf video:
In this article:
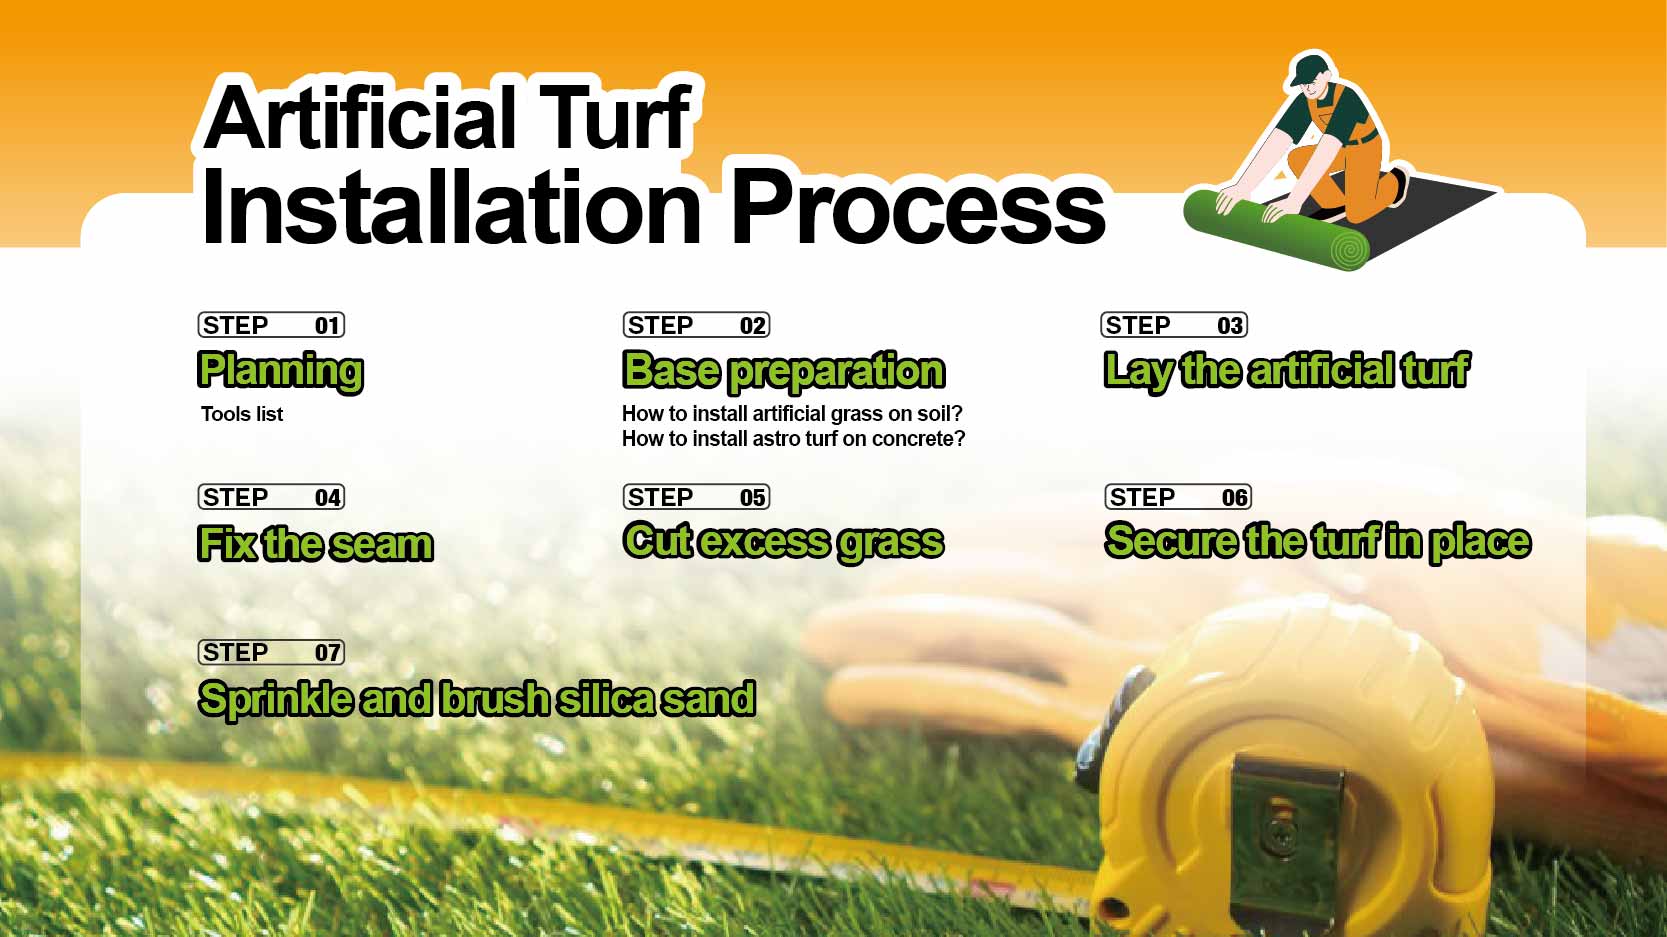
Artificial Turf Installation Process
Step 1: Planning
The first step for artificial turf installation is to plan out and measure your garden, figure out how much artificial grass and which accessories you will need.
The astro turf has a width of 2m or 4m and a length of up to 25m. Roughly calculating how many rolls need to be ordered will help you avoid a high amount of waste and ensure that you don’t overspend, maintaining the project cost-effective.
Considering drainage is crucial during the planning phase, as it directly affects the turf’s durability. In areas with good natural drainage, extensive planning may not be needed.
However, if drainage issues exist, proper base preparation can often resolve them without resorting to expensive drainage systems. For further guidance on artificial grass drainage and solutions for common issues, refer to our article, “What You Should Know about Artificial Grass Drainage.”
Tools required for artificial turf installation
Next, what tools do you need to prepare for laying synthetic turf? It depends on the type and size of your installation. Some elements are optional, and some are essential.
- Tape Measure
- Sharp Knife
- Spade or shovel
- Hammer
- Bristle Broom/Grass Rake/Motorised power brush
- Gloves
- Pins/nails
- Self-adhesive Joining Tapeor Joining Tape plus Joining Adhesive
- Aroller or vibrating plate to compact the sand (both can be hired)
- Weed block cloth –This is optional, but we highly recommend it for outdoor installation.
- Shockpad – This is optional,especially recommended for concrete surfaces.
Step 2: Base Preparation
Fake grass can be installed on a variety of different surfaces. Here we will focus on the ground preparations for installing artificial grass on soil and concrete.
How to install artificial grass on soil?
a. Get rid of weeds
Before installing grass, the first thing you do is to kill grassroots and weeds. Spray the area with a non-toxic weed killer you trust. Weed killers need ample time to work, so it is recommended that you do this at least two weeks in advance.
b. Add the base material
Get rid of the top layer of soil, about 3 inches to make room for your new base.
Use a shovel to scatter your base material. Generally, in places with a mild climate, you can use gravel, crushed rock, decomposed granite, or any stones smaller than 3/8 inches as a base. Around 3 inches of the base material is needed to improve drainage and avoid slumping.
Use a shovel or sand spreader to lay sand 10-15mm thick on the top of your sub-base to provide a smooth surface.
c. Compact the base
Compact the loose material into a strong base with the help of a roller or vibrating plate (both can be hired).
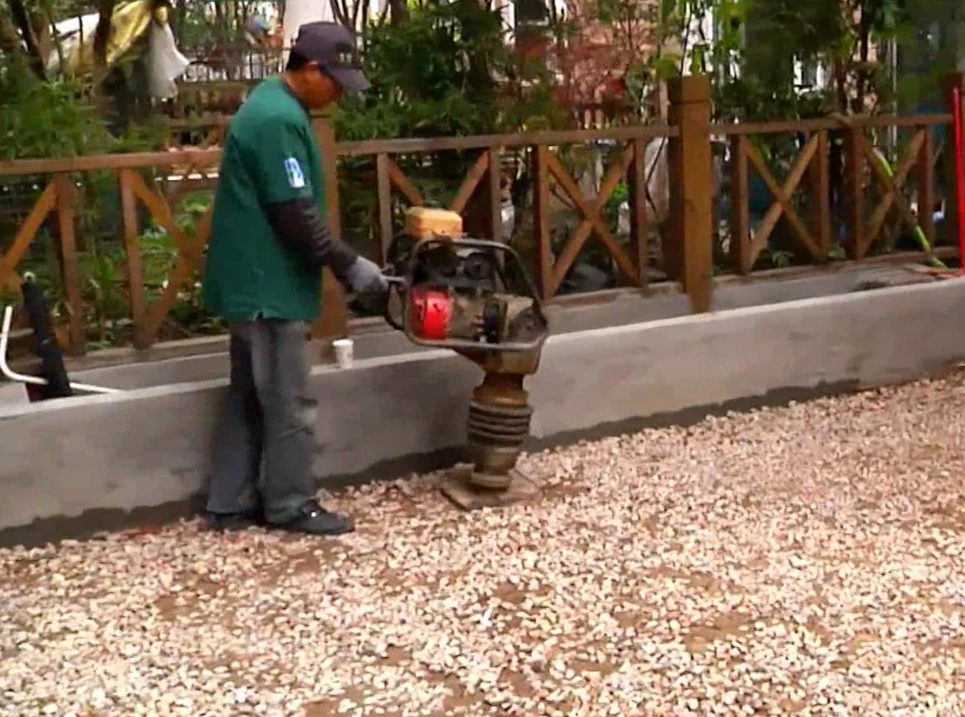
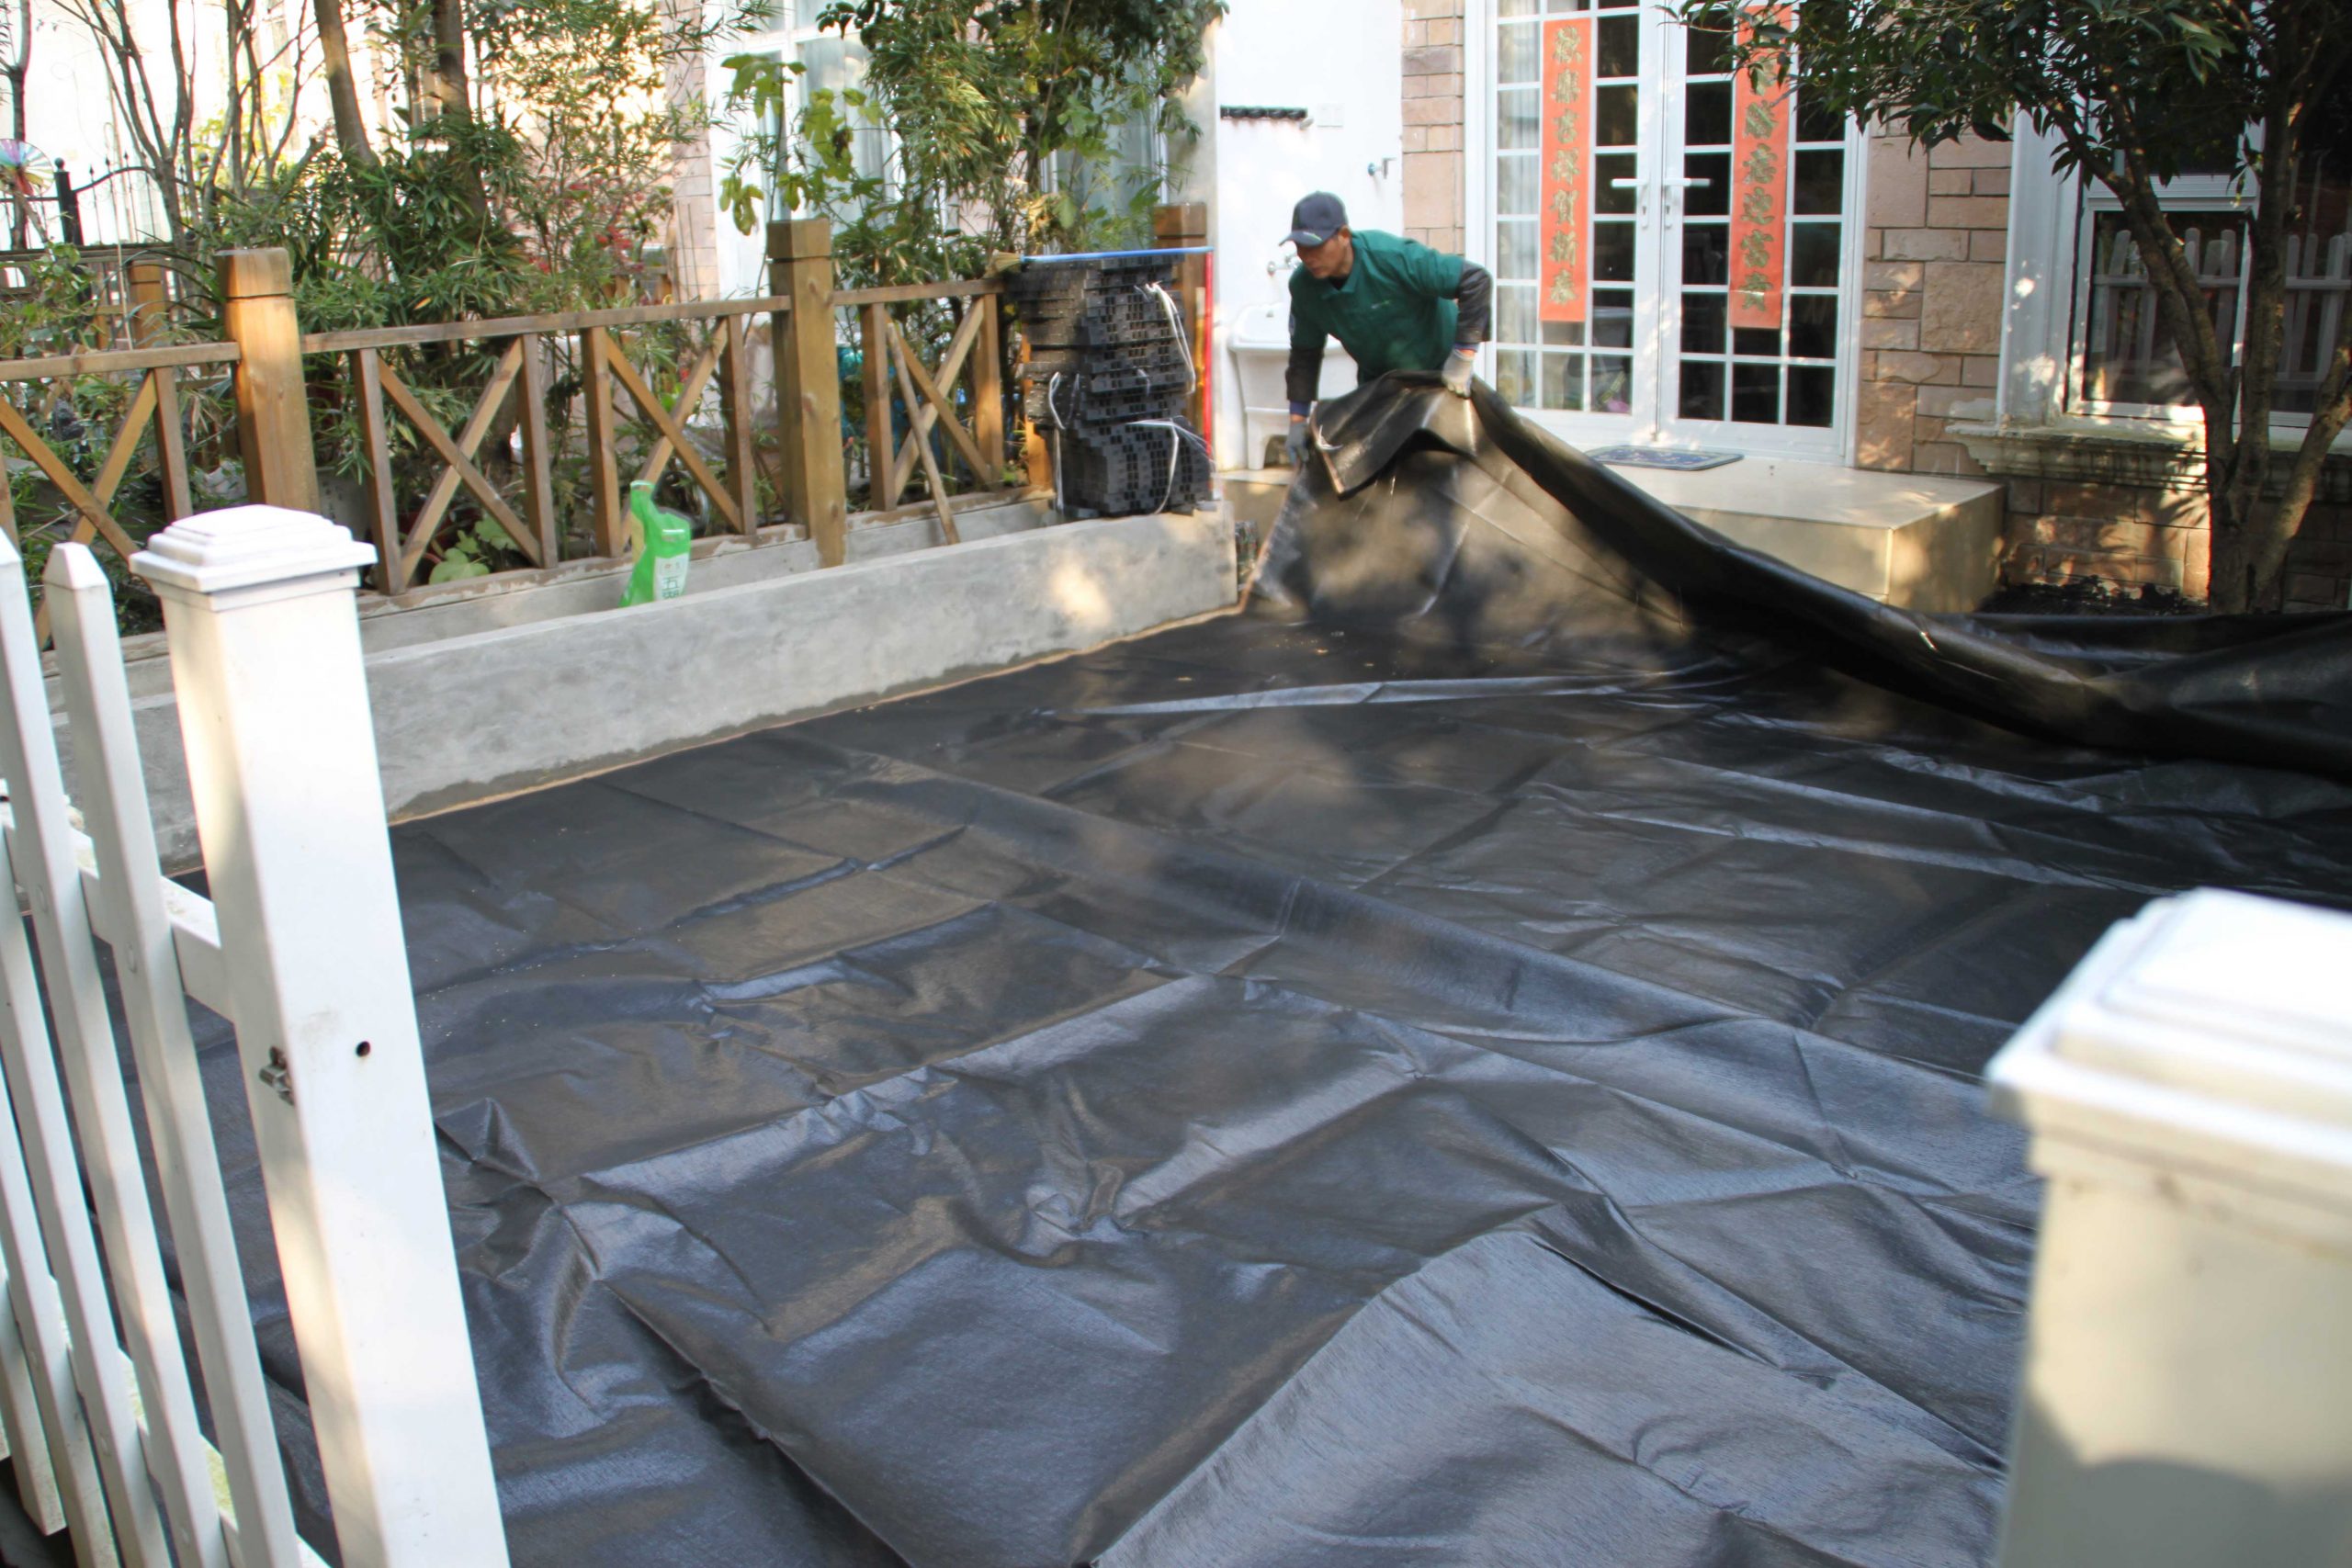
d. Optional: add a weed barrier
If necessary, after the base is compacted, cover the area with weed block cloth and secure in position with U-shaped nails around the perimeter.
How to install an astroturf on concrete?
a. Clean existing concrete
The uniform standard for the base is that the surface needs to be smooth, clean and level. First, clean your area thoroughly, and then check for uneven surfaces. If they aren’t too uneven and can be fixed, you can use self-leveling compounds.
b. Optional: install the shock pad
While fake grass can be directly laid on concrete, it’s advisable to consider incorporating shock pads in specific applications like play areas or recreational spaces. This enhances safety with cushioning and adds an extra layer of comfort.
Step 3: Lay the artificial turf
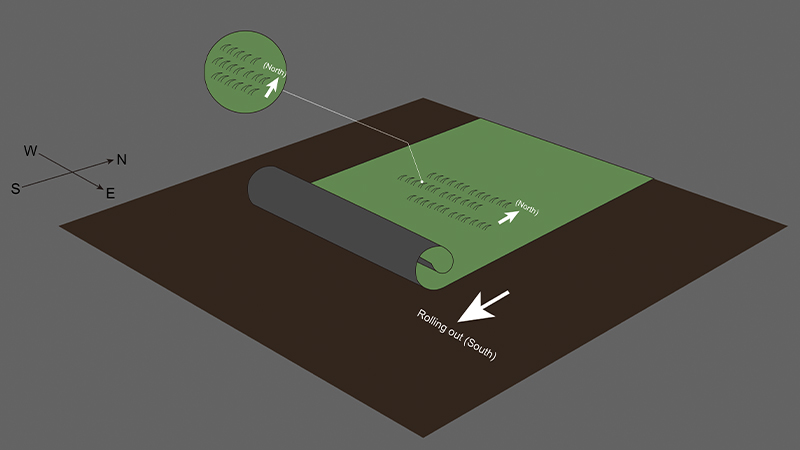
Unroll the artificial turf over the area, being careful to not move the weed block cloth, and then let the turf sit in the sun for a few hours – this allows any creases to fall out as well as the condition of the grass yarn will be better.
If you are working with multiple rolls, it is very important that the yarn direction and stitch patterns are facing the same way. Crossing yarn directions will result in poor appearance. Having the yarn direction running toward the house will give the best look from the windows of the house.
Step 4: Fix the seam
a. Cut off the manufacturing edge strip (if present) or cut off another stitch so that there is as little backing as possible next to the stitch and butt the two edges together.
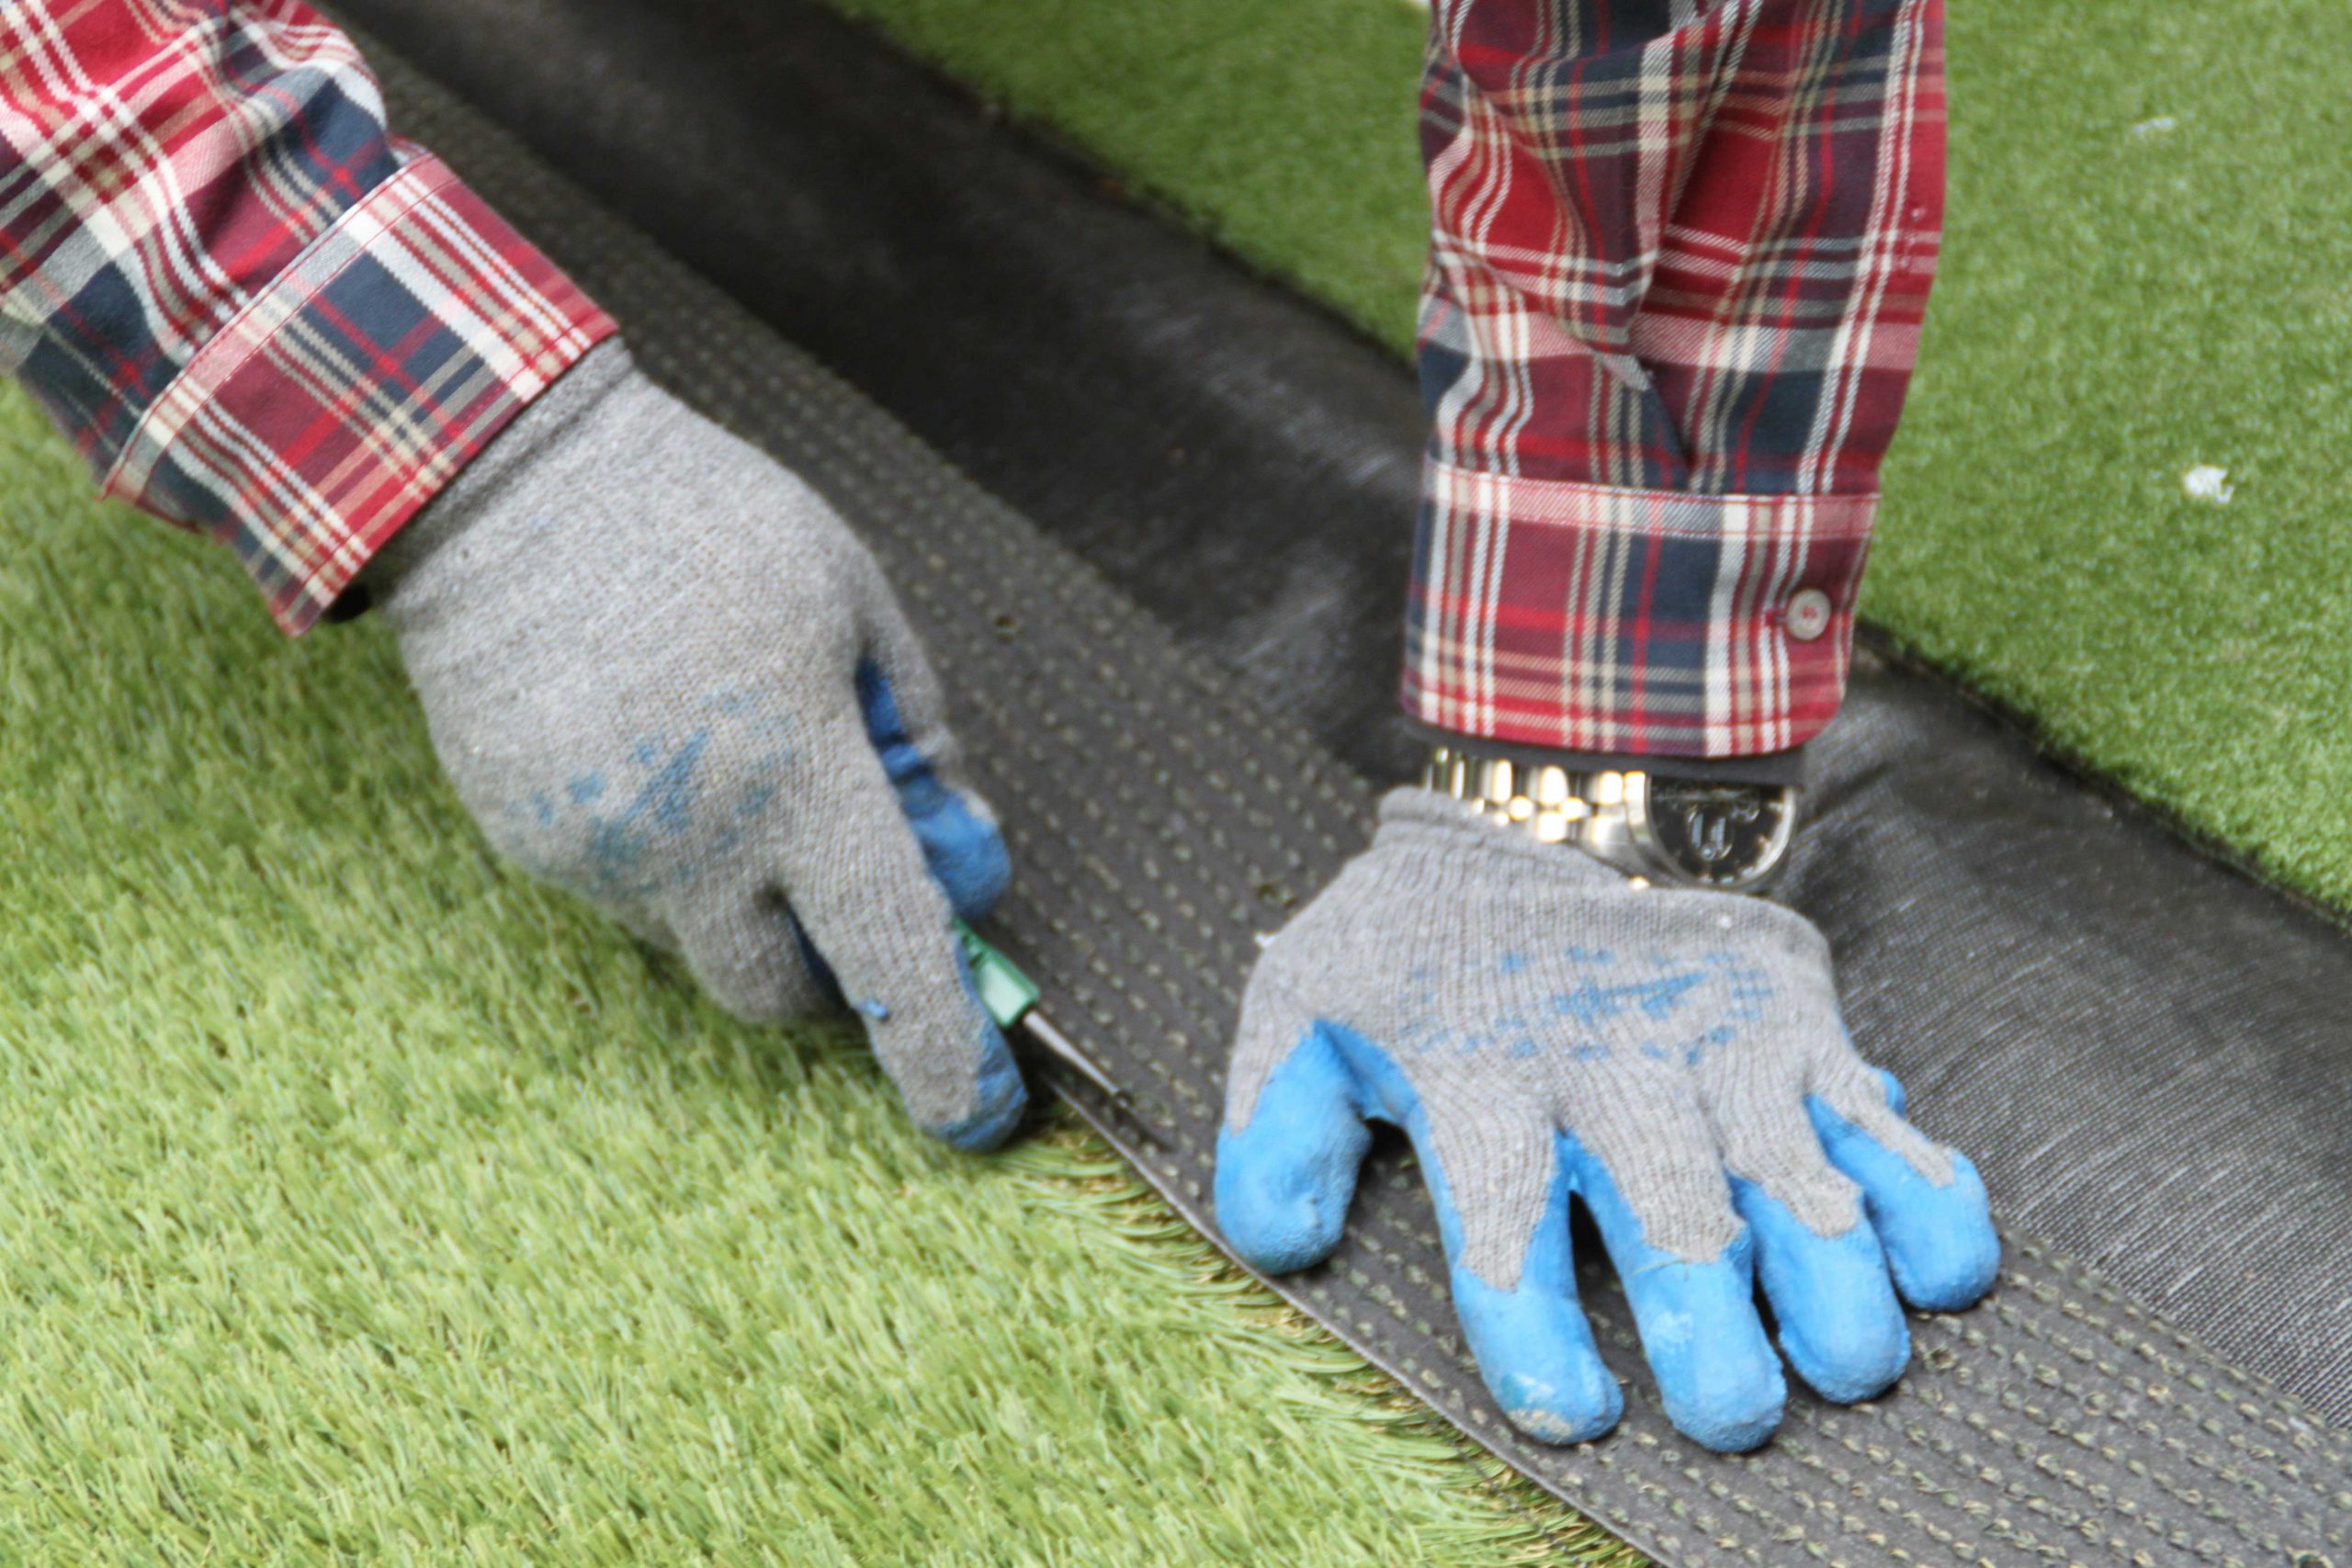
b. Fold back the edges and position self-adhesive jointing tape (smooth side down) so that the edges of the carpet meet down the centre of the tape when joined.
c. Fold the turf back into the adhesive tape starting from one end. Work your way down the seam carefully, joining the two pieces together. Make sure tufts aren’t damaged or buried.
Step 5: Cut excess grass
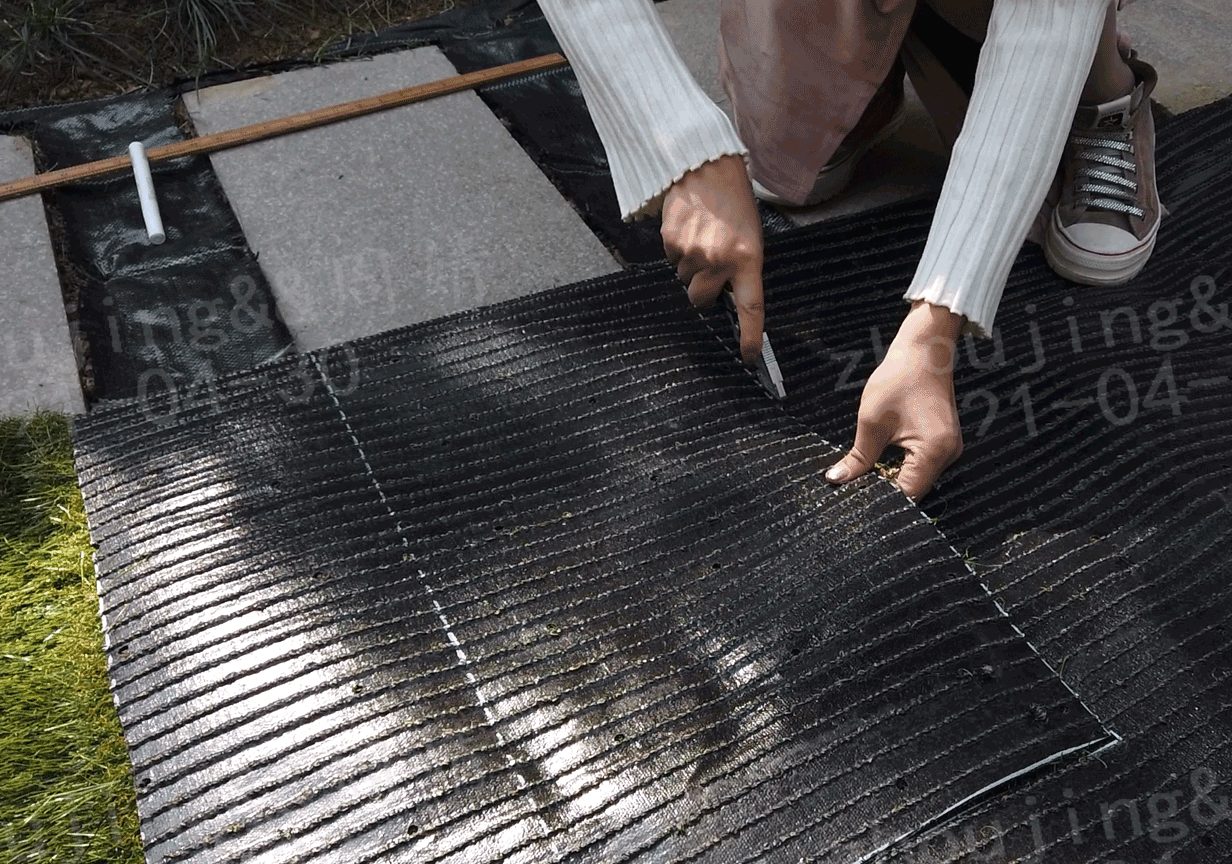
Trimming the excess grass around edges, corners, or obstacles is crucial for achieving a professional-looking installation. Here’s how to do it effectively:
a. Trimming around patio or garden edges
Hold the knife firmly and gently pull back the grass to expose the backing. Maintain a gap of no more than 1/8 inch between the backing and the patio edge while cutting.
b. Cutting against a wall or fence
Fold the turf back and press it tightly against the corner of the wall or fence. Place the blade against the backing where it lands closest to the wall, then lift the turf up and cut in increments of 6 inches at a time. Check the fit periodically by laying the turf back down, ensuring the backing is not too tight against the edges.
c. Relief cuts for corners, trees, or posts
Fold the turf back and make small outward relief cuts where the backing meets the object. Cut from point to point, fitting the grass to the exact curvature of the object.
Take your time during cutting to achieve a precise fit. The goal is for the grass to lay loosely around objects without touching them.
Step 6: Secure the turf in place
On soil: Secure the turf by stretching it taut and fastening it with landscaping pins placed every 6–8 inches along the perimeter. You can also place pins along the seam to secure the turf further.
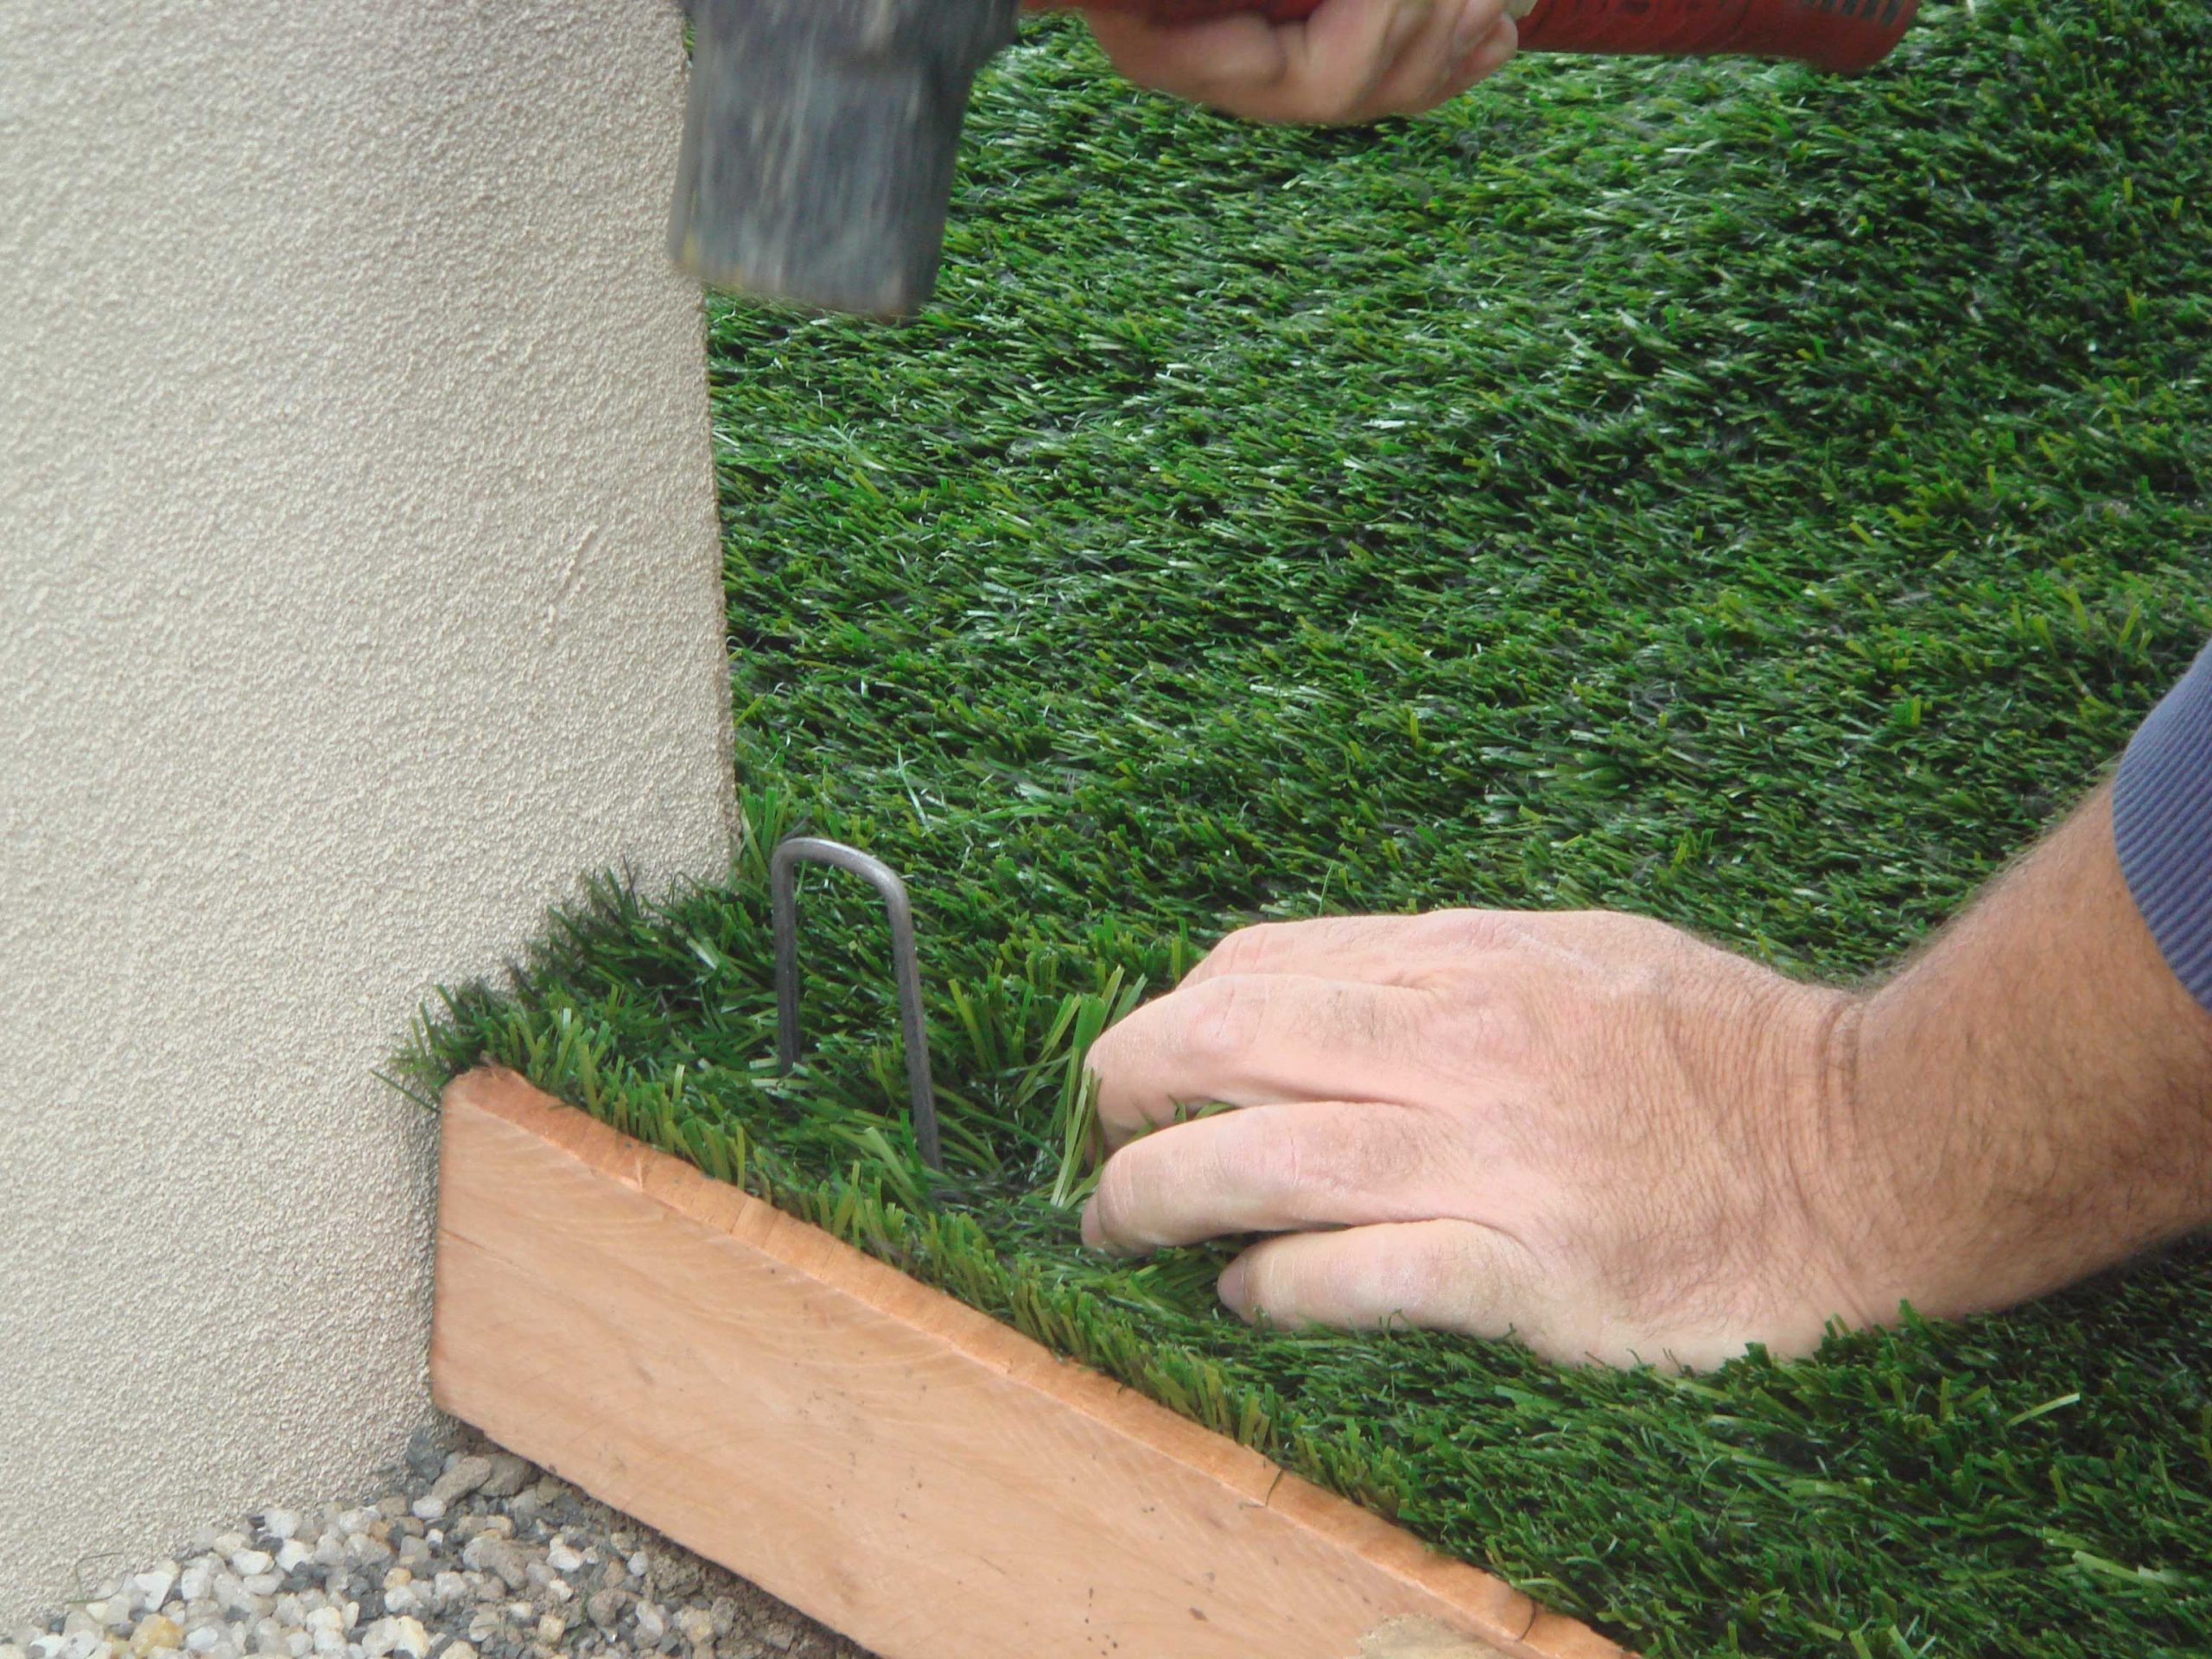
On concrete: Join the back of the artificial grass and concrete base with an adhesive every 6–8 inches along the perimeter. Alternatively, you can secure the edges with plants or other garden accessories.
Step 7: Sprinkle and brush silica sand
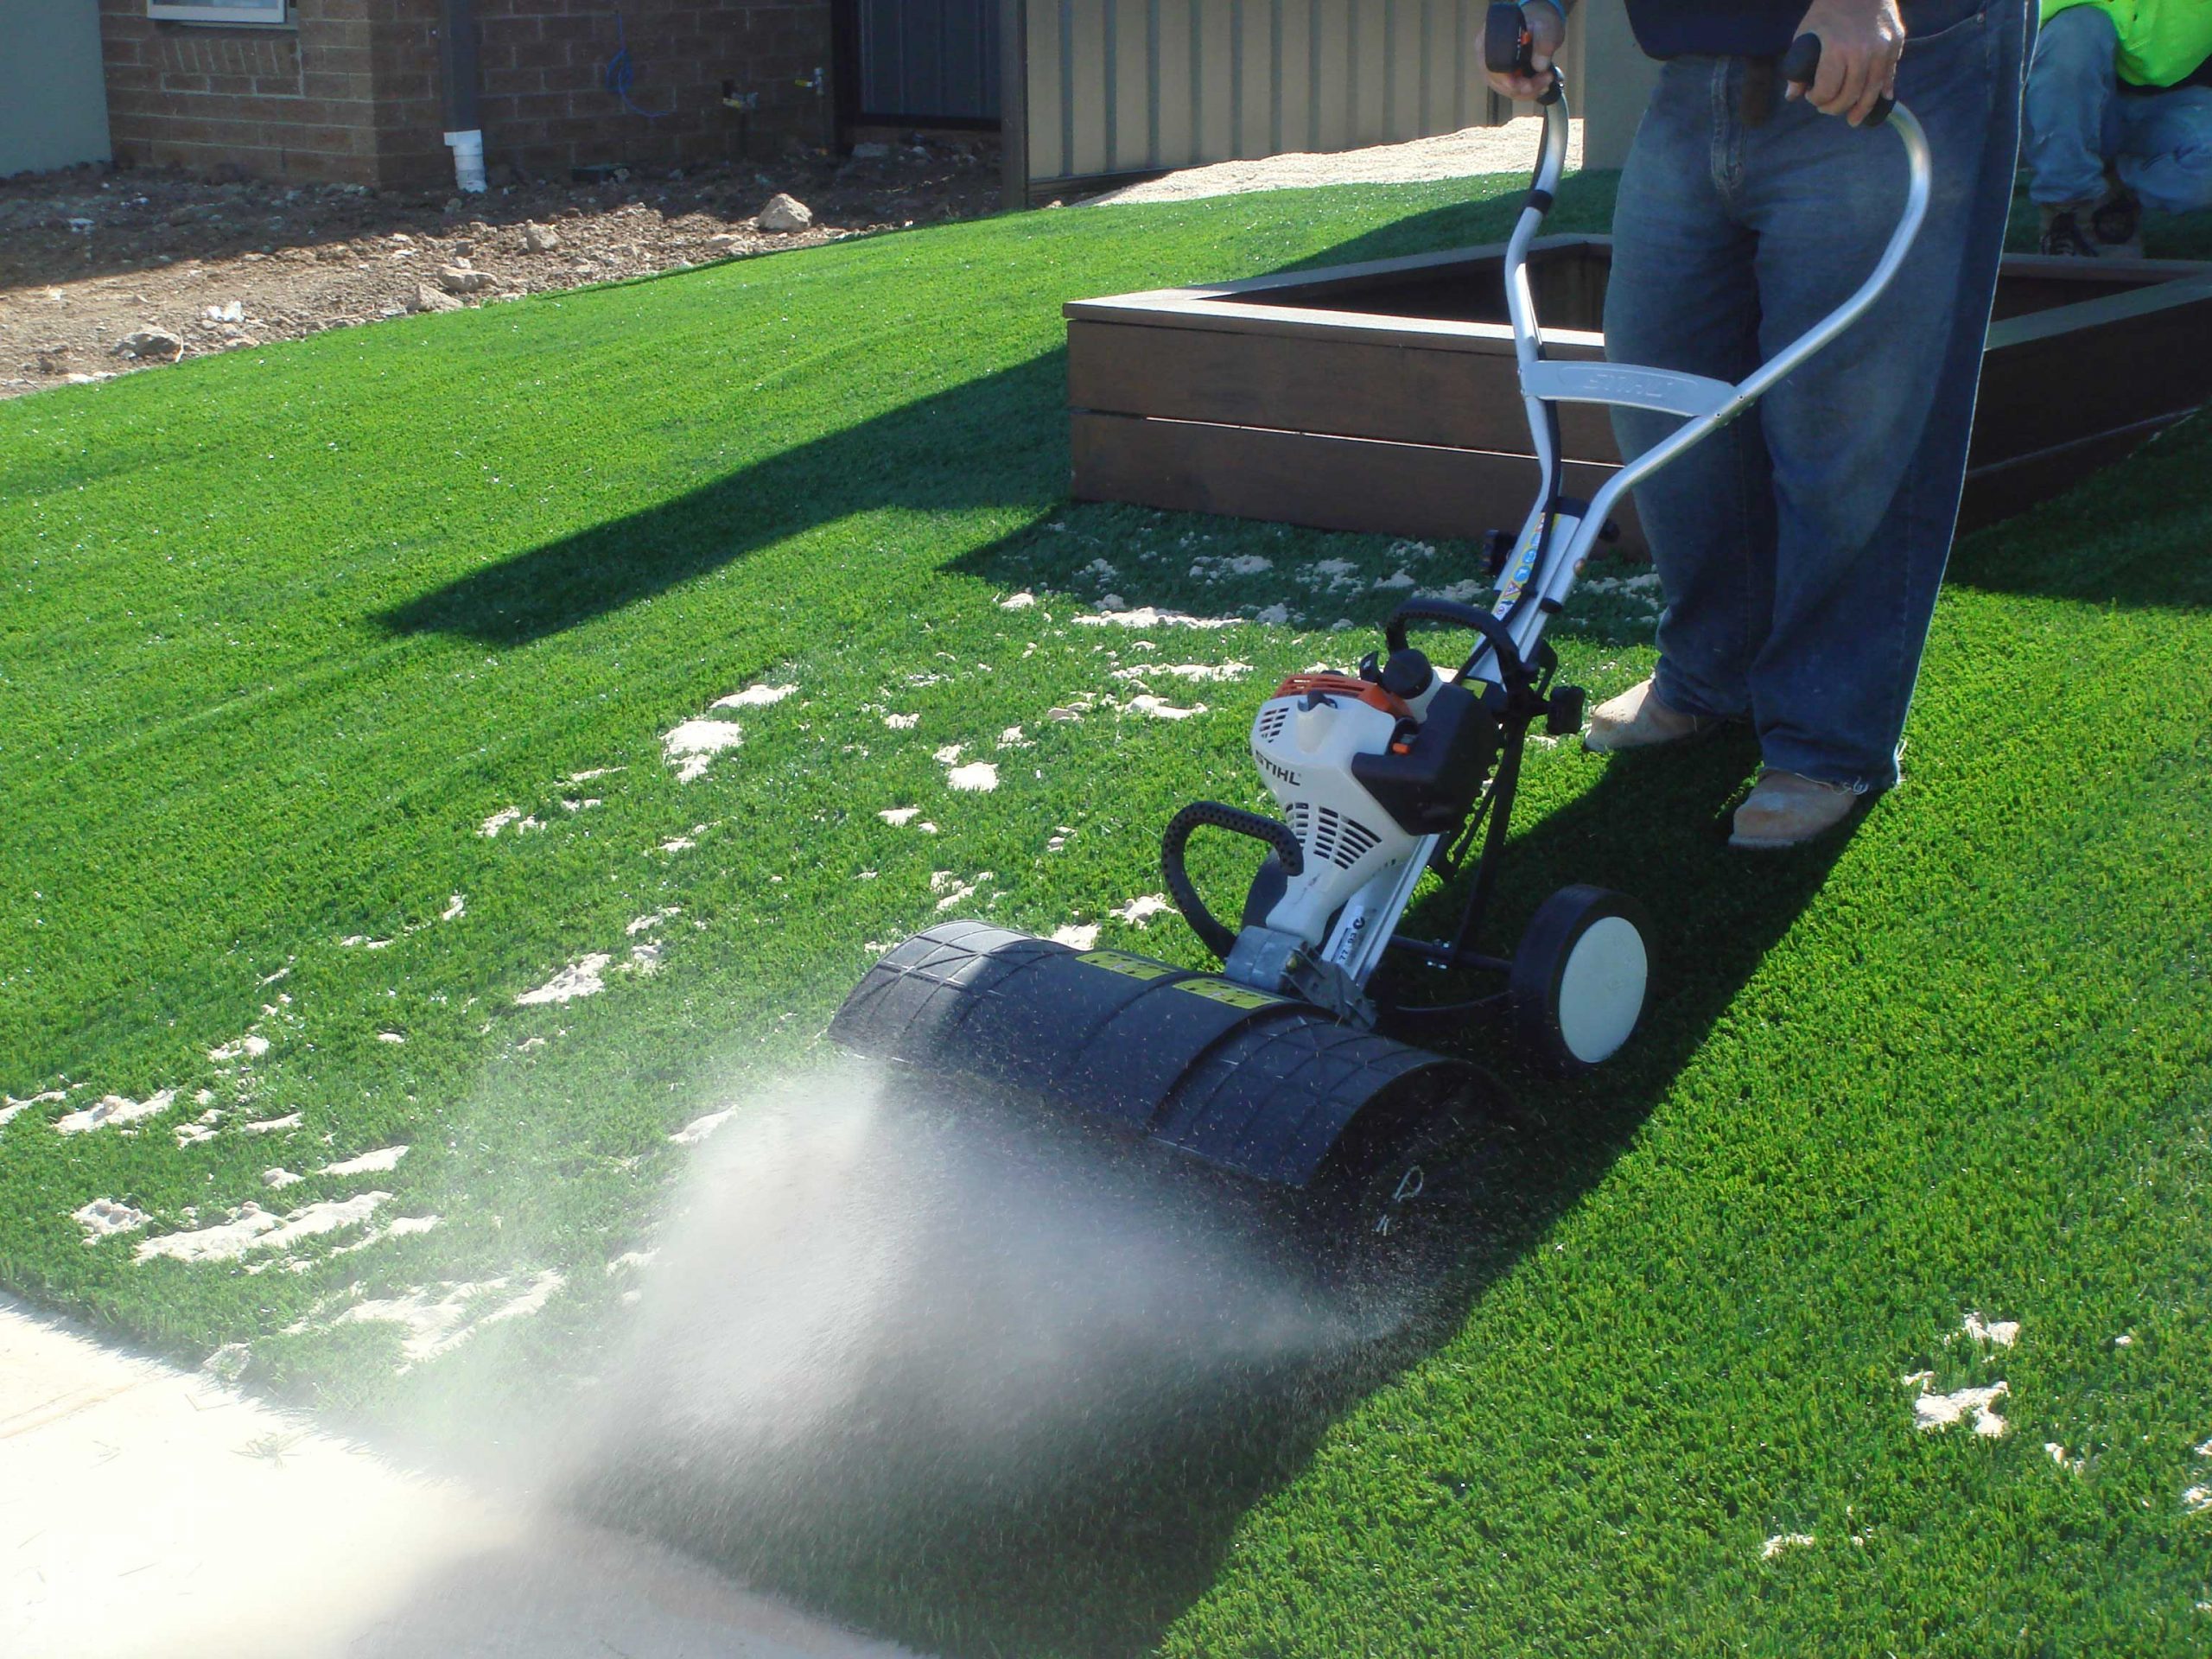
The final step for artificial turf installation is to spread silica sand across your astro turf, building the depth in layers. We recommend 6-8 kg of sand per square metre of lawn.
For the best results, we recommend using a bristle broom or a grass rake to brush the pile before, during and after. Brush against the pile fibre direction to encourage the individual grass tufts to stand upright.
Post-Installation Maintenance and Care
Regular cleaning & brushing
a. Clear away debris
Clear any debris from your fake grass on a regular basis, particularly following storms or windy days. Leaves, branches, and other items tend to gather on the turf, affecting both its visual appeal and performance.
You can easily accomplish this task by hand-picking larger items and using appropriate tools like a leaf blower, broom, or soft-tipped rake to remove smaller debris.
b. Rinse the turf
Regularly rinse your artificial turf with water to remove dust, pollen, and any loose dirt. Depending on your location and the frequency of rainfall, you may need to rinse the grass more or less frequently.
c. Brushing for a natural look
Routinely brushing up the fibers of the grass (against the grain) helps maintain an upright position, resulting in a lush and vibrant appearance for your lawn. Use a stiff-bristle broom or a specialized turf brush for this task.
d. Remove stains promptly
Spillages can be washed away with water. For lightly soiled areas, a simple solution of warm water and a small amount of mild detergent will do the trick. Wipe it with a sponge, then rinse.
Handling pet waste
a. Dealing with pet urine
Thanks to the drainage backing, the urine is naturally handled. You don’t have to clean the turf after every urination. It’s suggested to hose down the turf once a week, especially if it hasn’t rained, to remove any residue.
b. Cleaning up pet feces
Cleaning up pet feces from turf resembles caring for natural grass. Let the waste dry a bit to prevent smearing, then use a doggy bag or scooper for solid waste. In the case of diarrhea, remove as much as possible with a bag or paper towels. Lastly, thoroughly rinse the turf fibers with a hose to ensure cleanliness.
Repairing damaged artificial turf areas
a. DIY repairs for small areas
For minor damages, replacing the damaged patch may be a simple DIY project. It’s always advisable to retain leftover turf from the initial installation to use for repairs, ensuring the best color match.
Trim the damaged turf and place the new piece in the original location, aligning its fibers with those of the existing turf. Secure the turf with nails and a hammer, adding infill for consistency and appearance.
b. Professional help for larger areas
For more extensive damage, it may be necessary to enlist the services of professional turf installers to ensure a seamless repair.
Conclusion
There are pros and cons to hiring professional install crews or DIY artificial grass installation, and you need to evaluate your situation objectively and decide based on your budget. DIY artificial turf installation may seem like a daunting task, but it could also be a fun activity for the family.
CCGrass, the world’s leading artificial grass manufacturer, is dedicated to providing the best artificial turf for both sports and landscape purposes.
We manufacture a complete range of artificial turf applications for residential, commercial, DIY, pets, golf, city landscape and many more purposes.
Our wholesale partners are all over the world, including dealers, retailers, supermarkets, engineering contractors, etc., which means that the products have been widely recognized.
If you are interested in wholesale artificial grass, or have any questions about artificial turf installation and maintenance, please call 86 25 6981 1666 or email [email protected].


