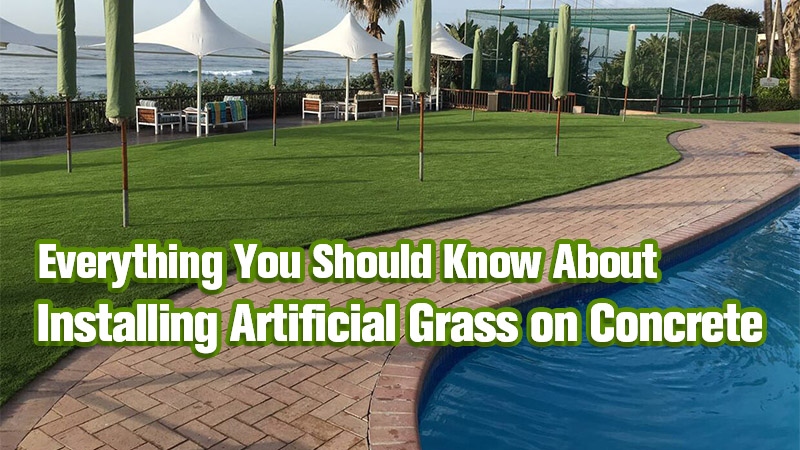
Everything You Should Know About Installing Artificial Grass on Concrete
Embarking on the journey to bring a touch of vibrant green to your concrete surroundings? This guide explores installing artificial grass on concrete—transforming lifeless spaces into lively retreats. From feasibility to benefits and a step-by-step roadmap, it’s your go-to resource for creating nature-inspired havens.
In this article:
Can you lay artificial grass on concrete or asphalt?
Yes—you absolutely can install artificial grass on concrete or asphalt, and in many cases, the process is even simpler than installing turf on soil. Hard surfaces eliminate the need for sub-base compaction, weed membranes, and multiple base layers.
However, achieving a durable and professional finish depends on evaluating the concrete surface correctly. Before laying synthetic turf on concrete, consider three key factors that affect durability, drainage, and comfort.
Key considerations before installing artificial turf on concrete
1. Is your surface smooth and even?
Concrete flaws don’t magically disappear under turf. Cracks, bumps, and low spots will eventually show through and can lead to unevenness or premature wear.
How to assess and repair:
Start by thoroughly cleaning the concrete. A moderate-pressure wash (around 1,500 PSI) will remove dirt and reveal hidden hairline cracks, bumps, or low spots. Ensure the surface is completely dry before making any repairs.
- Repairing cracks: Apply a vinyl-based concrete patching compound with a trowel, smooth the surface, and allow 24–48 hours to cure. For deeper or structural cracks, use an epoxy repair compound for extra strength.
- Fixing bumps (high spots): Grind or sand small raised areas with a concrete grinder or angle grinder with a diamond cup wheel. Larger bumps can be chipped away. Clean thoroughly afterward.
- Filling low spots (depressions): Use a self-levelling concrete compound or patching mix. Pour or trowel into the depression, smooth to blend with the surrounding surface, and allow it to cure fully before laying turf.
2. Does the area drain properly?
Artificial turf drains well thanks to its perforated backing, but its effectiveness depends entirely on the surface underneath. If water pools on the concrete, moisture can get trapped beneath the turf, which may lead to unpleasant odours, mould growth, or damage to the backing.
Quick drain test:
Spray down a small section (around 10×10 ft) and watch how it drains. If puddles remain after 5–10 minutes, your slab likely needs a drainage improvement.
How to improve drainage:
- Install a full drainage layer
For the most reliable solution, add a drainage layer between the concrete and turf. For outdoor or high-traffic areas, use perforated drainage tiles; for lighter-use areas, a thinner drainage mat works well.
This layer creates air and water channels, allowing moisture to escape and keeping the turf dry, hygienic, and comfortable underfoot.
- Address localized water pockets
For isolated water spots—and only if the concrete sits over soil—drill small holes (around 16 mm) and fill them with gravel, creating simple drain points to relieve trapped water.
Indoor installations typically do not require these measures.
3. Do you need a shock pad?
Not always. Shock pads add comfort and safety, but they’re not required for every installation. Here’s a practical guide to help you decide based on how the space will be used:
| Scenario | Needed? | Our Take |
| Children’s Play Areas & Public Playgrounds | Yes | Essential for fall protection. Public spaces must meet safety standards. |
| Gyms & Fitness Spaces | Yes | Improves impact absorption, joint comfort, and noise control—an important upgrade for fitness use. |
| Pet Lawns | Optional | Adds softness, but drainage matters more. Choose based on comfort preference. |
| Residential Lawns, Patios & Balconies | No | Turf alone is comfortable enough for daily use. No need for extra padding. |
| Commercial Landscaping | No | Focus on durability and drainage; a shock pad is generally not necessary for commercial use. |
Top benefits of laying artificial grass on concrete
Why go green over gray? Beyond the obvious curb appeal boost, installing fake grass on concrete delivers practical perks that make your space more livable year-round.
Instant aesthetic and functional upgrade
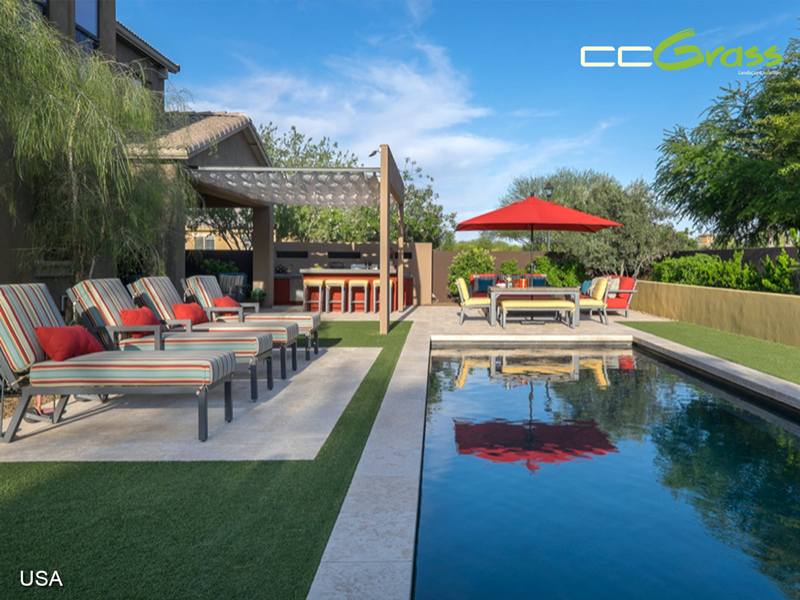
Swap boring concrete for a soft, inviting lawn that elevates any space. Synthetic turf on a concrete pool deck reduces slips and adds tropical flair, while a turf play zone becomes a safe haven for kids and pets. No more muddy paws or scraped knees—just pure, evergreen joy.
Endless design flexibility
Artificial turf can be cut into curves, borders, or geometric shapes—perfect for custom edging, balconies, or rooftop terraces. Beyond simple cuts, it can also be customized with patterns, colors, or themed designs, allowing you to create unique green spaces that reflect your personal style or brand identity.
Improved temperature comfort
Concrete heats up quickly under strong sun. Synthetic grass provides moderate thermal insulation, helping the surface stay more comfortable during hot summer conditions. While the turf can still get warm, it’s noticeably cooler and gentler than bare concrete.
Versatility across residential and commercial applications
Artificial turf can be installed on concrete almost anywhere. Popular residential uses include patios, balconies, rooftop terraces, pool decks, driveways, courtyards, and kids’ or pets’ play areas.
Commercial applications span restaurant and café seating zones, retail displays, office terraces, hotel patios, event spaces, and indoor green zones. Its ability to soften, brighten, and modernize concrete surfaces makes it a favored choice for both homeowners and business owners alike.
How to install artificial grass on concrete? Step-by-step guide
Once you’ve assessed the surface and addressed any issues with smoothness, drainage, or comfort, the actual installation is straightforward. Follow this step-by-step guide to achieve a clean, durable, and long-lasting turf surface on concrete or asphalt.
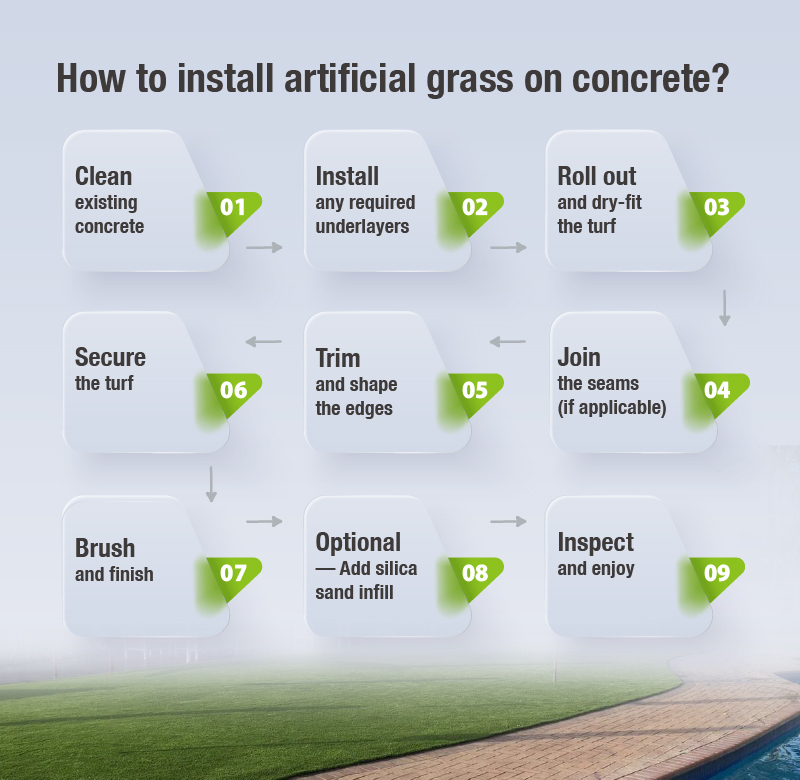
Step 1: Clean existing concrete
Begin by thoroughly cleaning the concrete surface of any debris, chemicals, dirt, mold, or residue. You can hose down the concrete and scrub it with a stiff broom.
Allow the surface to dry, ensuring that any chemicals from cleaning agents completely dissipate before moving on to the next step.
Step 2: Install any required underlayers
Based on your earlier decisions regarding drainage or shock pads, lay any required underlayers now. This could include:
- Drainage tiles or mats to help moisture escape and maintain a dry, comfortable surface.
- Shock pads for added comfort and safety in play areas or gyms.
Fit the layers snugly, trimming edges as needed. Ensure everything lies flat with no gaps or raised sections. If using interlocking pieces, make sure they click securely; rolls should remain smooth and stable.
Tip: Secure with outdoor tape or adhesive dots where necessary to prevent shifting, but avoid covering the entire surface—airflow and drainage are still important.
Step 3: Roll out and dry-fit the turf
Unroll the artificial grass carefully over the area and let it relax for 1–3 hours. This allows the fibers and backing to settle naturally, helping prevent ripples or tension spots.
If your installation involves multiple pieces, dry-fit each section first. Arrange all pieces in their intended positions, checking dimensions, alignment, and pile direction.
Tip: At this stage, you can also do a rough trim along the edges to remove large overhangs. This makes seam alignment easier and helps ensure the turf fits the area before joining.
Step 4: Join the seams (if applicable)
If your installation uses multiple turf pieces:
- Fold back both edges.
- Place seaming tape (shiny side down) between them.
- Apply adhesive to the tape.
- Press both turf edges onto the tape carefully, ensuring the fibers blend seamlessly.
- Walk gently back and forth along the seam a few times to ensure the adhesive bonds securely.
- Brush the fibers upward to hide the seam.
Step 5: Trim and shape the edges
Using a sharp utility knife, trim the turf to fit the exact outline of the area. Follow natural edges like walls, borders, railings, or curves.
Always cut from the backing side for clean, precise edges. Take your time—accurate trimming is key to a neat, professional finish.
Step 6: Secure the turf
Since you’re working on concrete, nails aren’t an option. Secure the turf using one or a combination of the following:
- Heavy-duty outdoor double-sided tape — great for balconies or areas requiring easy removal.
- Turf adhesive (glue) — for permanent, long-term installations.
- Adhesive strips — a balance between strength and flexibility.
- Furniture or weights — for indoor or low-traffic areas, placing furniture or planters can help keep the turf in place.
Apply adhesives (if used) around the perimeter and at key anchor points. Avoid covering the entire surface; leaving airflow paths allows moisture to escape and helps maintain hygiene and durability.
Step 7: Brush and finish
Use a stiff broom or power brush to lift the fibers, distribute pile direction consistently, and give your installation a full, natural look.
For non-infill turf, this step is especially important to enhance appearance and soften the surface.
Step 8: Optional — Add silica sand infill
While not always required on concrete installations, a light layer of silica sand can help:
- Add stability
- Reduce wrinkling
- Keep fibers upright
- Improve UV protection
If you choose to add infill, spread evenly and brush thoroughly.
Step 9: Inspect and enjoy
Walk the entire surface to ensure:
- No raised edges
- No visible seams
- Proper drainage
- A smooth, comfortable finish
Once satisfied, your artificial grass installation on concrete is complete and ready for use.
Conclusion
We hope this guide has given you practical tips on how to install artificial grass on concrete. For our esteemed partners and dealers, we offer extensive support materials to enhance your market service and penetration.
At CCGrass, we have a comprehensive turf line catering to sports, landscaping, commercial spaces, putting greens, and pet-friendly areas. Want to explore more about our products or have specific questions? Connect with us today at 86 25 6981 1666 or via email at [email protected].
